This post contains affiliate links which means that if you click and make a purchase I may receive a small commission, at no cost to you. All opinions are my own.
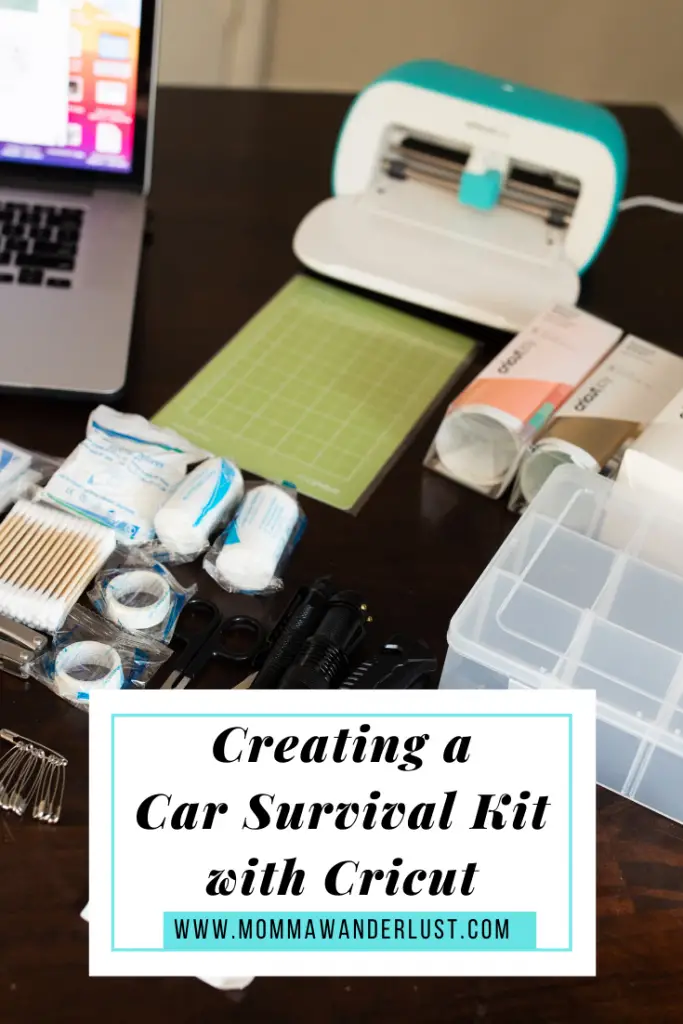
Looking to create a car survival Kit with your Cricut machine? We spent most of our summer in our car on road trips. But it’s always nice to be prepared for any mishaps that might happen while on the road. That’s why I feel it’s important to have a car survival kit. I was able to put one together rather quickly using my Cricut Joy. Making your survival kit is easy. Here’s my step-by-step guide on how you can create one too.
Contents
What’s an Emergency Car Survival Kit?
A car survival kit is a stash of items that can help you to work through minor emergencies. We discovered halfway through a 10-hour family road trip that our daughter gets carsick on long rides. We, unfortunately, did not have a car survival kit during our roadside fiasco. A car survival kit would’ve come in handy. But I’ve resolved that we won’t be caught unawares again. This is why I created this handy car survival kit to help us out if we get into a bind.
Car Survival Kit Materials Needed:
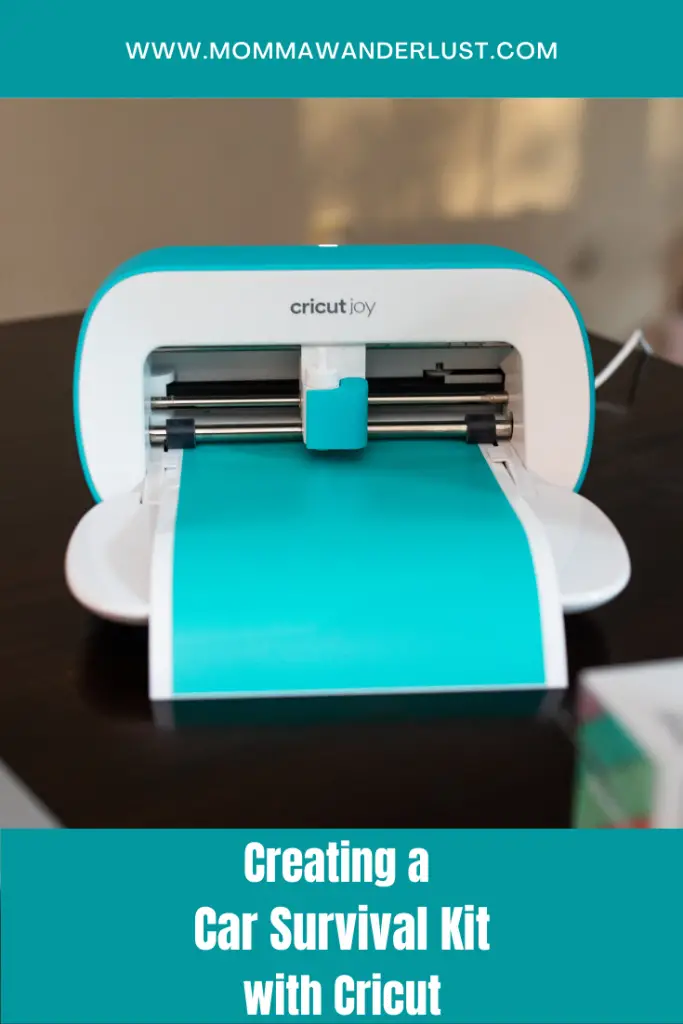
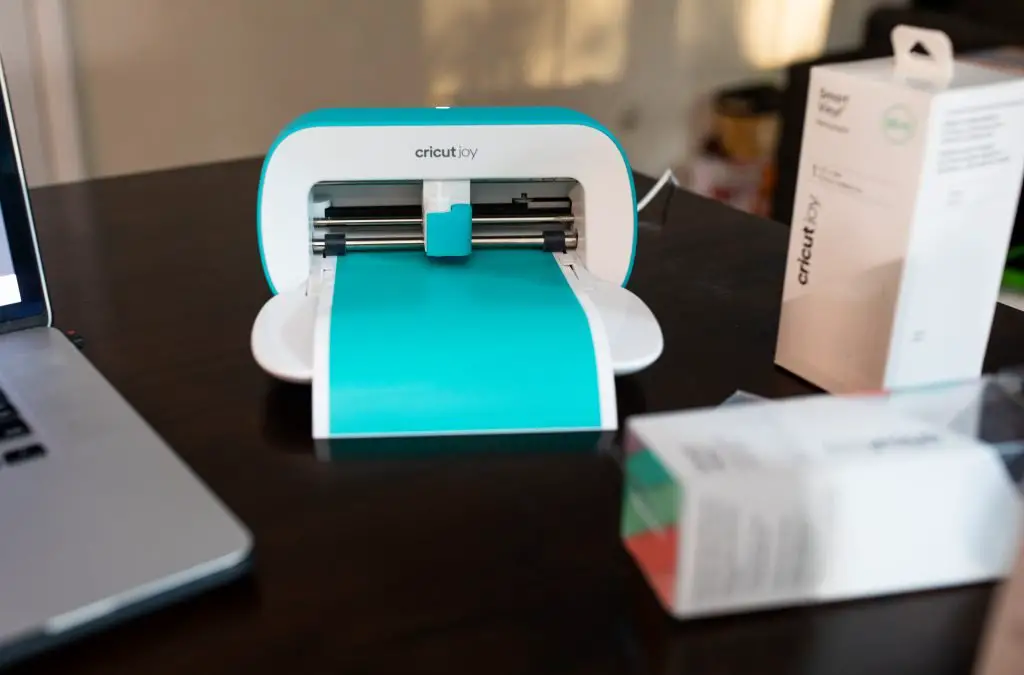
For this project, I used my Cricut Joy. I own two Cricut cutting machines (Cricut Explore and the Cricut Joy). The Cricut Joy is compact which allows me to craft anywhere in my house or while I’m on the road. The machine is incredibly easy to work with and if you can’t think of a design you’d like to create, hop online and visit the Cricut Design Space for craft inspo.
Step one to create your car survival kit is to jot down a list of the things you might need in a pinch. Every family is different. There’s no one-size-fits-all for what to include in your car survival kit. But, for the record, our car survival kit will include anti-motion sickness meds and car sick bags.
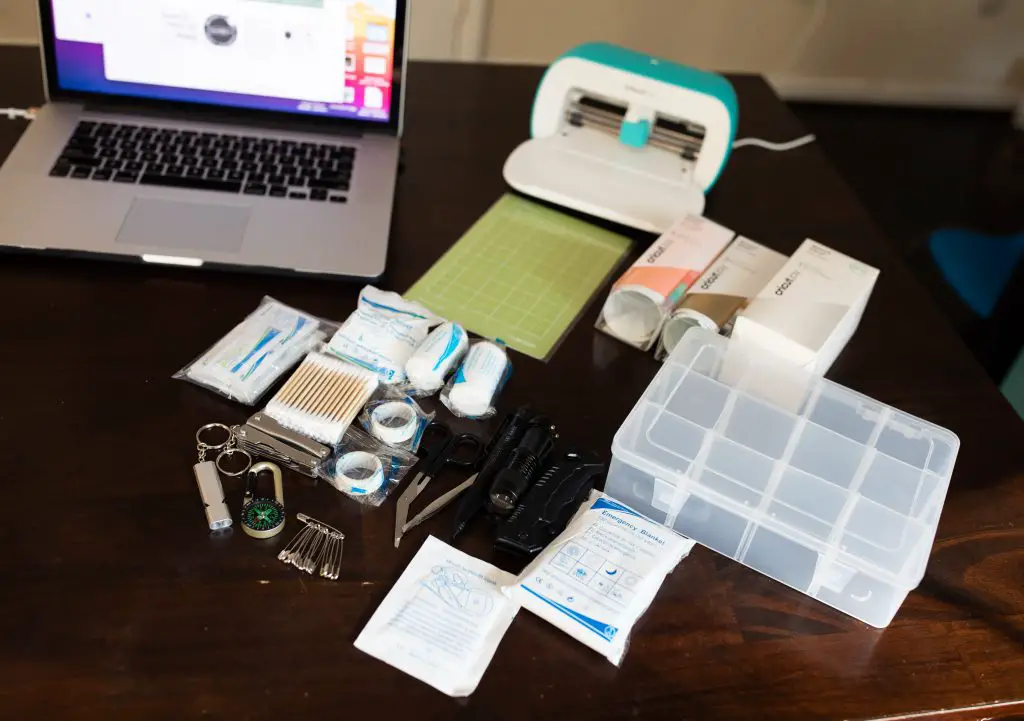
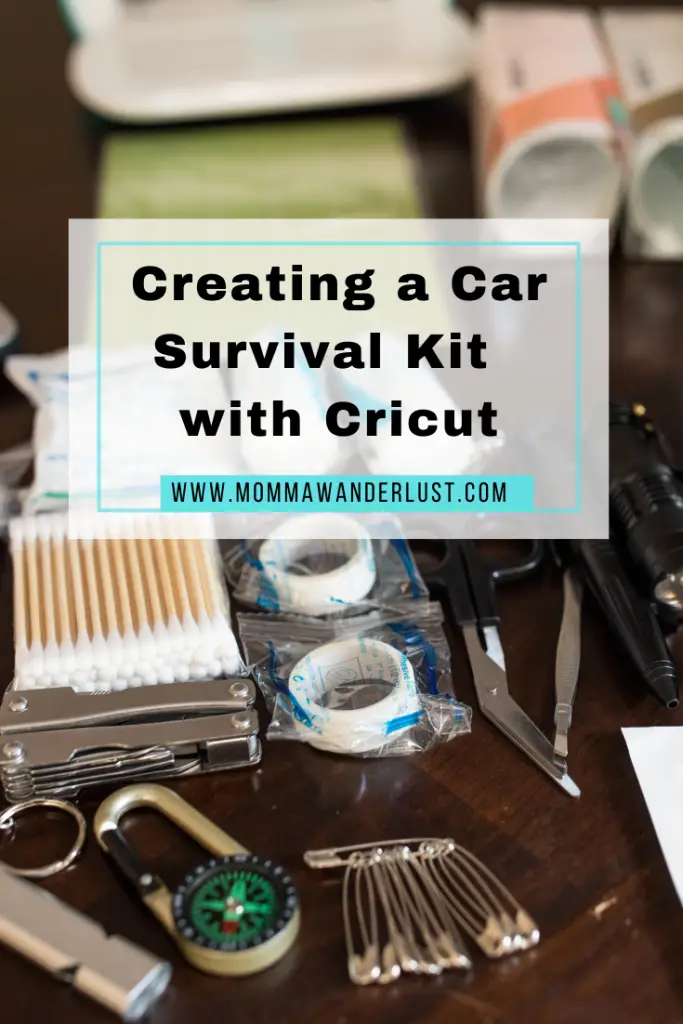
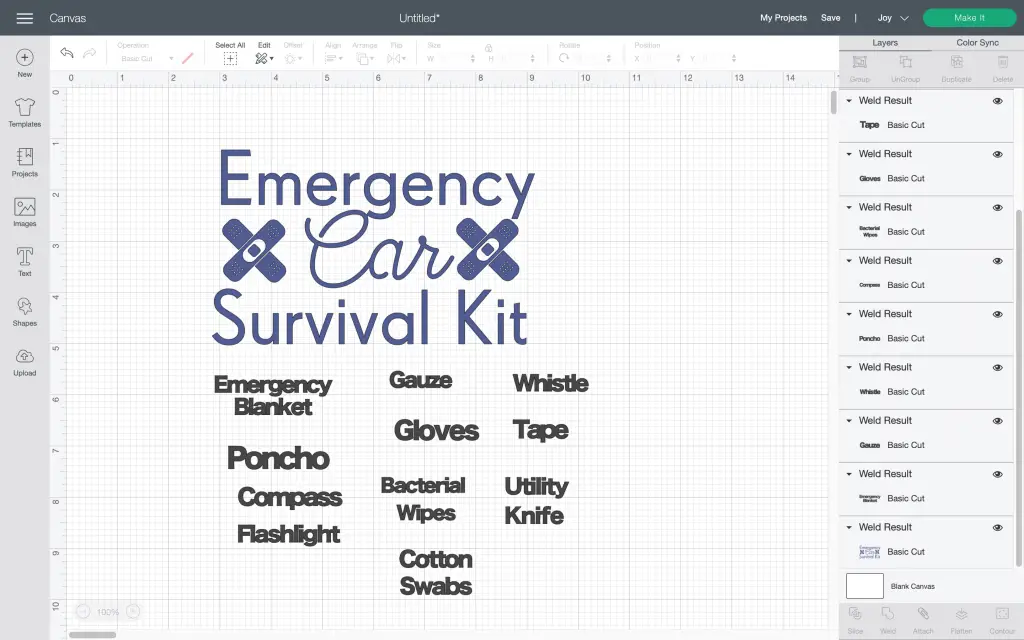
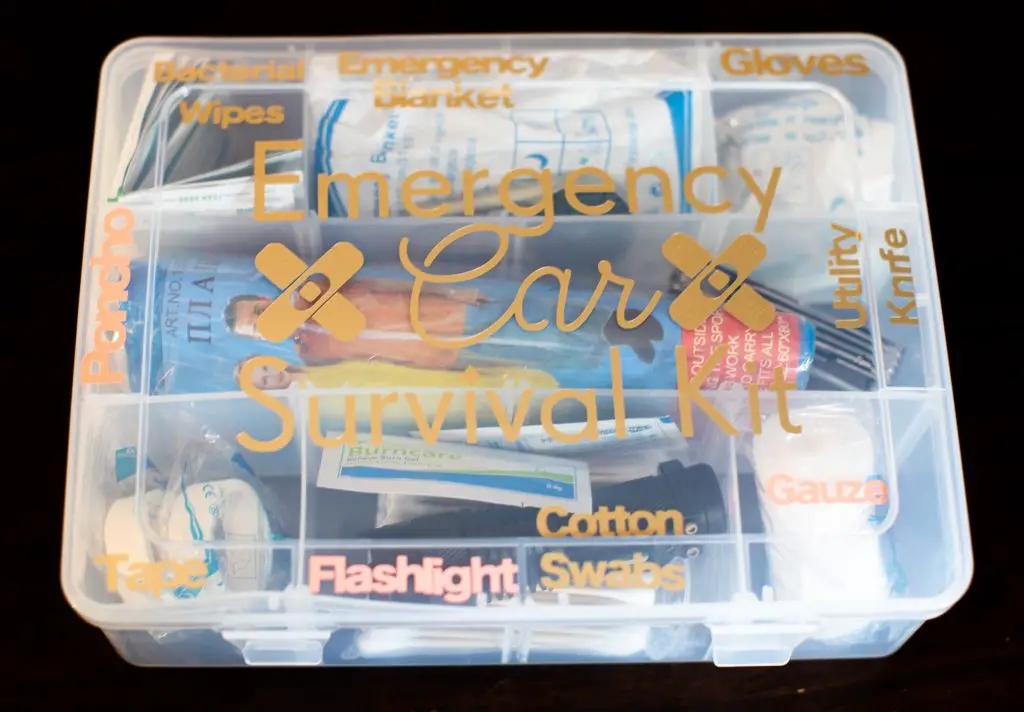
My family’s Car Survival kit included:
Scissors
Poncho
Flashlight
Compass
Bandages
Antiseptic ointment
Burn Cream
Rubber Gloves
Mylar blanket
Plastic bag
Safety pins
Anti-motion sickness meds
Carsick bags
Cotton swabs
Plastic container with adjustable compartments (I found this one on Amazon)
To create your own car survival kit, you’ll first need to gather your supplies. For this project you will need:
Cricut Joy
Cricut Joy Smart Removable Vinyl
Cricut Joy Premium Permanent Vinyl
Starter Tool Set
How to Create a Car Survival Kit
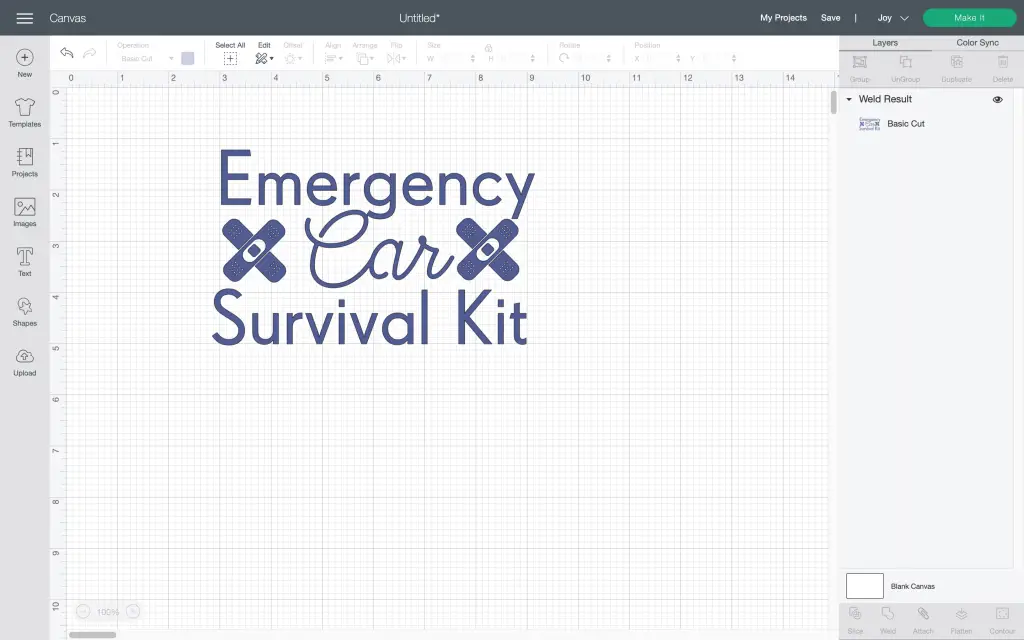
Open the Cricut Design Space and click on the plus (+) sign to start a new project. A blank canvas will open on your screen. Select the fonts you like and type your labels. Be sure to check the size of your labels to ensure they will fit in the space you want the labels. Measure the compartments on your plastic container to figure out how large each design should be. If necessary, resize your labels and click “Continue”. Select the “Weld” button on the bottom left-hand side of the screen to ensure all sections of the image are cut together.
Select the green “Make it” button to start the cutting process. A box will appear asking what type of materials you are planning to load for cutting. I selected the “Cut without a mat” option since I was using Cricut’s Smart Vinyl, which comes mounted on a mat. Click “Done” and your cutting mat will appear on the screen. Select “Continue” and then Cricut Design Space will connect your device to the Cricut Joy via Bluetooth.
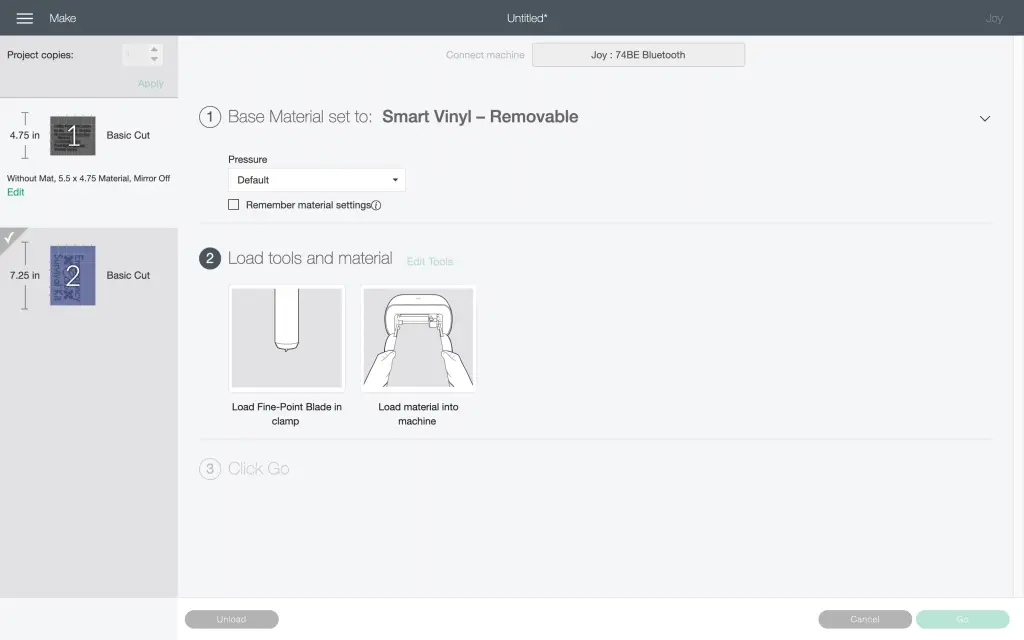
You’ll then be prompted to load your material, once that is done press “Go” and the Cricut will begin cutting your design. Now, is a good time to make a quick cup of tea or check in on the kiddos. But don’t go too far, your project will be cut in a minute or two.
Emergency Car Survival
After everything is cut, use the Cricut weeding tool to remove the excess vinyl from your design. Cut a piece of transfer tape. Make sure to cut it a bit larger than the design. The extra tape along the outside of the design helps to keep it steady on the surface box of the box during the transfer process. Place the transfer tape on top of the vinyl design, use the Cricut scraper to rub on the back of the transfer tape to make sure the vinyl adheres to it.
Then position the tape to the surface of the box where you’d like the vinyl sign to be placed. Lightly rub the scraper across the design to make sure the vinyl adheres to the surface. Slowly peel the transfer tape off of the vinyl design. Now that all of your labels are affixed, fill your box with your car survival kit essentials. Place your new car survival kit somewhere convenient inside your vehicle and you’re all done.
[This is a sponsored conversation written by me on behalf of Cricut. All opinions are my own.]
If you found Creating a Car Survival Kit with Cricut helpful, you might also like:
-
Teaching Kids Manners with Cricut
-
10 Essential Tips to Avoid Car Sickness in Kids
-
Top 10 Tips for Road Trips with Kids
Pin for later: